
Have you ever stumbled across a plant so unique it stops you in your tracks? That’s Hoya Imbricata for you a tropical beauty with overlapping leaves that hug surfaces like a living hug. If you’re here, you’re likely wondering how to master Hoya Imbricata care and keep this quirky gem thriving. I get it caring for a plant with such specific needs can feel daunting, especially when you’re worried about droopy leaves or a no-show bloom season. But don’t sweat it! I’ve been growing hoyas for years, and I’m spilling all my secrets in this guide to help you transform your Hoya Imbricata into a showstopper.
This isn’t just another basic care rundown. We’re diving deep way beyond the usual “water it sometimes” advice into actionable steps, personal anecdotes, and little-known hacks to solve every problem you might face. Whether you’re a newbie plant parent or a seasoned green thumb, you’ll walk away with everything you need to make your Hoya Imbricata flourish. Let’s get growing!
What Makes Hoya Imbricata So Special?
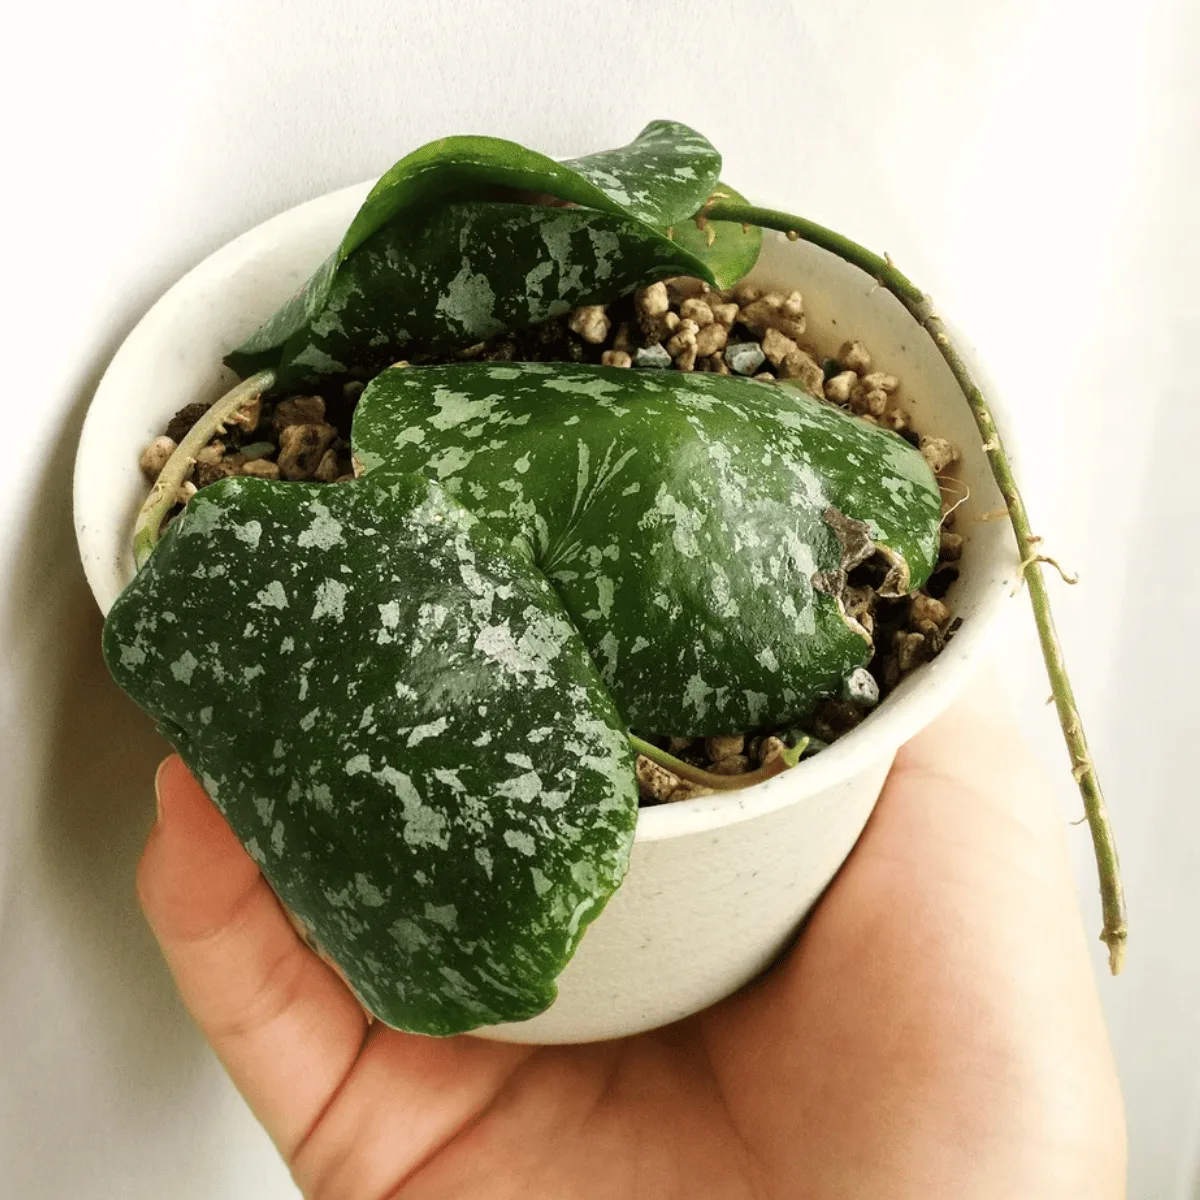
Before we jump into the nitty-gritty of Hoya Imbricata care, let’s talk about why this plant deserves a spot in your home. Native to the steamy jungles of Southeast Asia, Hoya Imbricata is an epiphyte, meaning it grows on other plants or surfaces in the wild, sipping nutrients from the air and rain. Its standout feature? Those broad, glossy leaves that shingle over each other, sometimes curling into little pouches or forming a dome-like structure. Oh, and it’s nicknamed the “ant plant” because ants love nesting under its leaves in nature how wild is that?
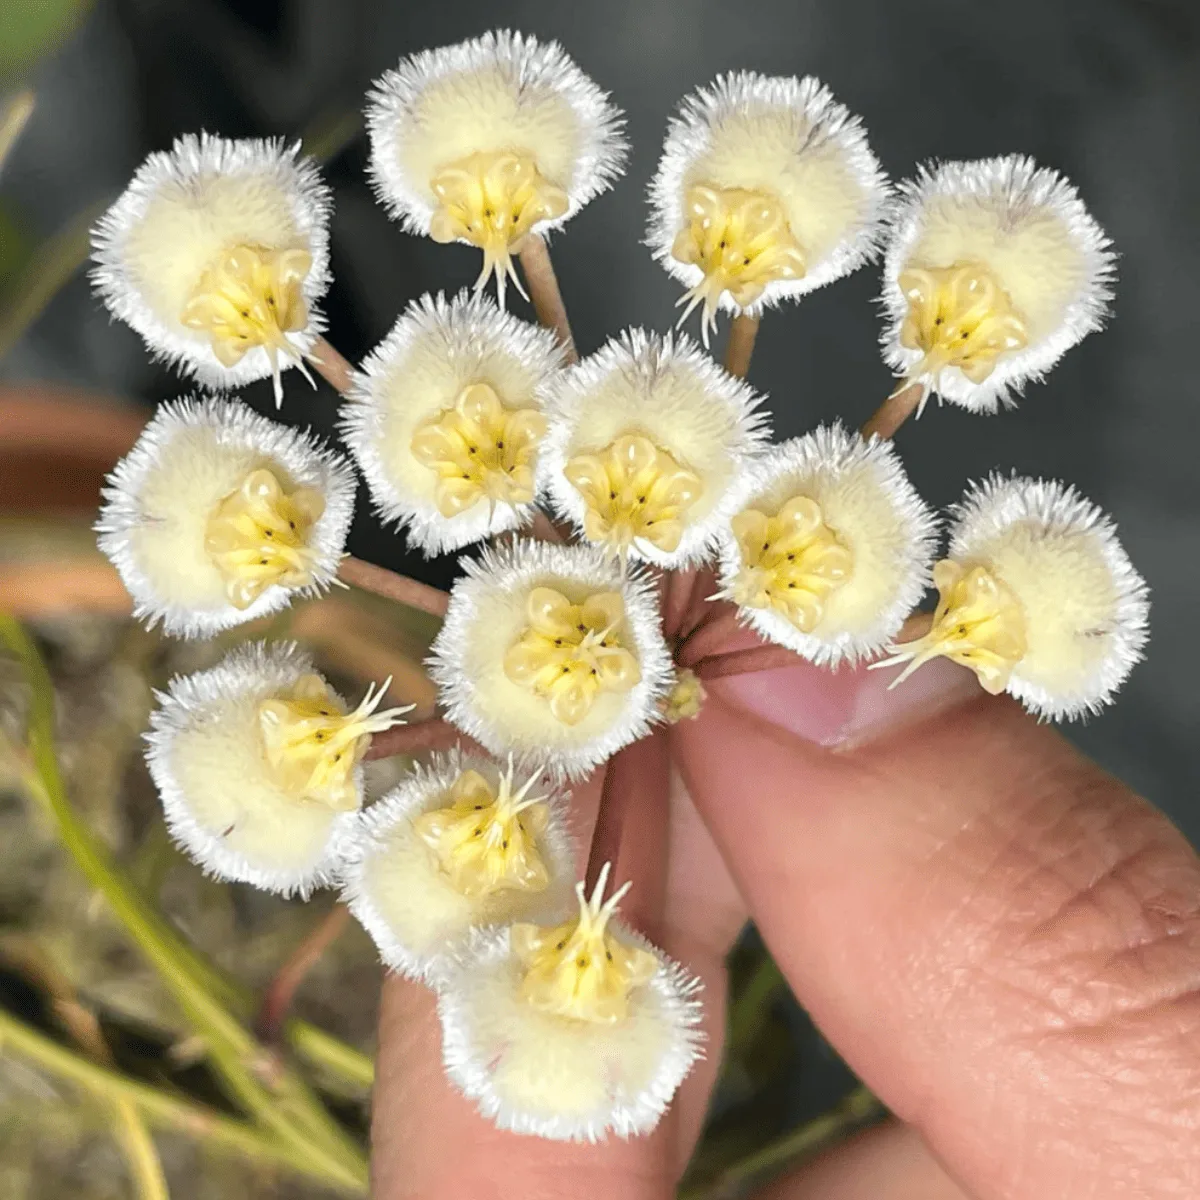
The payoff? When happy, it rewards you with clusters of star-shaped, greenish-cream flowers that smell faintly sweet. But here’s the catch: it’s a bit of a diva. Get its conditions right, and it’s a dream. Miss the mark, and you’ll be staring at a sad, leafless stem. Stick with me, though I’ve made all the mistakes so you don’t have to.
Hoya Imbricata Care: The Essentials You Need to Know
1. Lighting: Finding the Sweet Spot
Hoya Imbricata loves bright, indirect light think of it like a sunbathing session with a parasol. In its natural habitat, it’s tucked under tree canopies, so direct sunlight is a no-go unless you want crispy, sunburned leaves. My go-to spot? About 3-4 feet from a south-facing window with a sheer curtain. East or west windows work too, but if you’re stuck with low light, grab a grow light (I swear by a simple LED one).
- Pro Tip: If the stems stretch out with big gaps between leaves, it’s begging for more light. Move it closer to your window, but not so close it fries.
- Personal Oops: I once left mine too close to a southwest window in summer— cue one very sad, scorched leaf. Lesson learned!
2. Temperature and Humidity: Channeling the Tropics
This plant’s a heat-lover, thriving between 65-85°F (18-29°C). Anything below 50°F (10°C), and it’s shivering—think leaf drop and a sulky vibe. Keep it away from drafty windows or AC vents. I nearly lost mine to a sneaky winter breeze once; now it’s safely perched away from the door.
Humidity is where Hoya Imbricata gets picky it craves 60% or higher. Dry air? You’ll see wilting or browning edges. I use a humidifier (a cheap one from the store does wonders), but a pebble tray with water under the pot works too. Misting? Sure, if you’re diligent, but I’m too forgetful for that daily chore.
- Hack: Group it with other plants to create a mini humidity bubble. Just don’t crowd it—airflow matters to avoid mold.
3. Watering: Don’t Drown the Diva
Watering Hoya Imbricata is all about balance. Let the top inch of soil dry out before giving it a drink usually every 7-10 days in bright light, less in dim corners. Use your finger to check; if it’s still damp, wait. When you water, go thorough but make sure it drains out—no soggy bottoms here, or you’re inviting root rot.
- Signs You’re Overdoing It: Yellow leaves or a mushy stem? Ease up and check your drainage.
- My Trick: I water mine in the sink, let it drip dry, then pop it back. Keeps the roots happy and my table clean.
4. Soil: The Perfect Mix
This plant hates heavy, soggy soil. Go for a well-draining mix: I blend one-third peat moss (for moisture), one-third perlite (for drainage), and one-third orchid bark (for airiness). Some folks swear by soilless options like leca or coco coir honestly, I’ve tried leca and it’s a game-changer for avoiding overwatering disasters.
- Quick Fix: If you’re stuck with regular potting soil, mix in extra perlite. It’s not ideal, but it’ll do in a pinch.
5. Fertilizing: Feed It, But Don’t Overfeed
Hoya Imbricata isn’t greedy. During spring and summer, I give it a balanced liquid fertilizer (like 20-20-20) diluted to half strength every 2-4 weeks. Come fall and winter, I skip it it’s napping, not munching. Want flowers? Switch to a bloom-booster with more phosphorus, though I’ll admit, mine’s been stubborn about blooming even with the fancy stuff.
- Watch Out: Too much fertilizer leaves crusty buildup on the soil. Flush it with water every few months to keep things fresh.
Advanced Hoya Imbricata Care Tips
Propagation: Multiply the Magic
Want more Hoya Imbricata? It’s super easy to propagate with stem cuttings. Here’s how I do it:
- Snip a 4-6 inch stem with 2-3 nodes and a few leaves, cutting just below a node.
- Trim off the bottom leaves leave the top ones and dip the cut end in rooting hormone (optional, but it speeds things up).
- Pop it in water (change it every few days) or damp soil. Cover with a plastic bag with holes for humidity.
- Wait 2-3 weeks for roots to sprout in water, a bit longer in soil. Once they’re an inch long, pot it up!
- Heads-Up: That milky sap can irritate skin. I learned that the hard way gloves are your friend.
Pests: Keeping the Creepy Crawlies Away
Mealybugs and aphids love hoyas. Spot those white fuzzy blobs or tiny green bugs? Dab mealybugs with a Q-tip soaked in rubbing alcohol, and spray aphids with neem oil. I check mine weekly caught a mealybug invasion early once and saved the day with a quick alcohol swipe.
- Prevention: Good airflow and not overwatering keep pests at bay. Trust me, it’s easier than playing bug exterminator.
Displaying It: Show Off That Shingling Style
Hoya Imbricata shines when mounted on wood or bark, letting its leaves shingle naturally. I’ve got mine on a cedar plank with sphagnum moss tucked around the roots looks like a piece of living art. Hanging baskets work too, but the leaves might curl into cute little purses instead of flattening out. Either way, it’s a stunner.
- Idea: Snap a pic of your setup and frame it proof you’ve mastered Hoya Imbricata care!
Flowering: Chasing Those Elusive Blooms
Those star-shaped flowers are worth the wait, but they’re shy. Bright light’s a must—too dim, and it won’t bother. I’ve had luck with a bloom-booster fertilizer, but consistency is key. If buds drop, check your watering too much or too little can spook them. Leave the flower stalks after blooming; they might sprout again next time.
- Anecdote: My first bloom took two years. When it finally happened, I practically threw a party!
Troubleshooting Common Hoya Imbricata Problems
- Yellow Leaves: Overwatering or poor drainage. Cut back and repot if needed.
- Leaf Drop: Too cold or drafty. Move it to a cozier spot.
- No Growth: More light or a nutrient boost might wake it up.
- Wrinkled Leaves: Underwatering or low humidity. Give it a drink and a humidity bump.
I’ve faced all these at some point plants are like kids, always throwing curveballs. The trick is patience and tweaking one thing at a time.
Final Thoughts: Your Hoya Imbricata Journey Starts Here
Hoya Imbricata care might sound like a puzzle, but once you crack it, it’s pure joy. From dialing in the perfect light to watching those leaves shingle up a board, every step builds your bond with this plant. I’ve poured my heart and a few too many watering mishaps into this guide to save you the guesswork. So grab your Hoya Imbricata, give it some love, and watch it thrive. Got questions or a cool setup to share? I’d love to hear about it plants are better when we geek out together!
FAQ About Hoya Imbricata Care
When the top inch of soil feels dry—every 7-10 days in good light, less in low light.
It’ll sulk below 60%. Boost it with a humidifier or tray to keep it perky.
Not enough light or nutrients. Up the brightness and try a bloom-booster.
Yes, it’s non-toxic, but that sap can still annoy curious nibblers.
Slow-growing, it can spread a few feet if mounted or trail in a basket.
Totally! It loves the humidity, just ensure some airflow and light.