The first time I dealt with root rot, I was convinced my Hoya just needed more water.
The leaves were turning yellow.
Some even looked wrinkled.
So naturally…
I watered it again.
That was the worst thing I could have done.
A few days later I lifted the plant from its pot and immediately knew something was wrong.
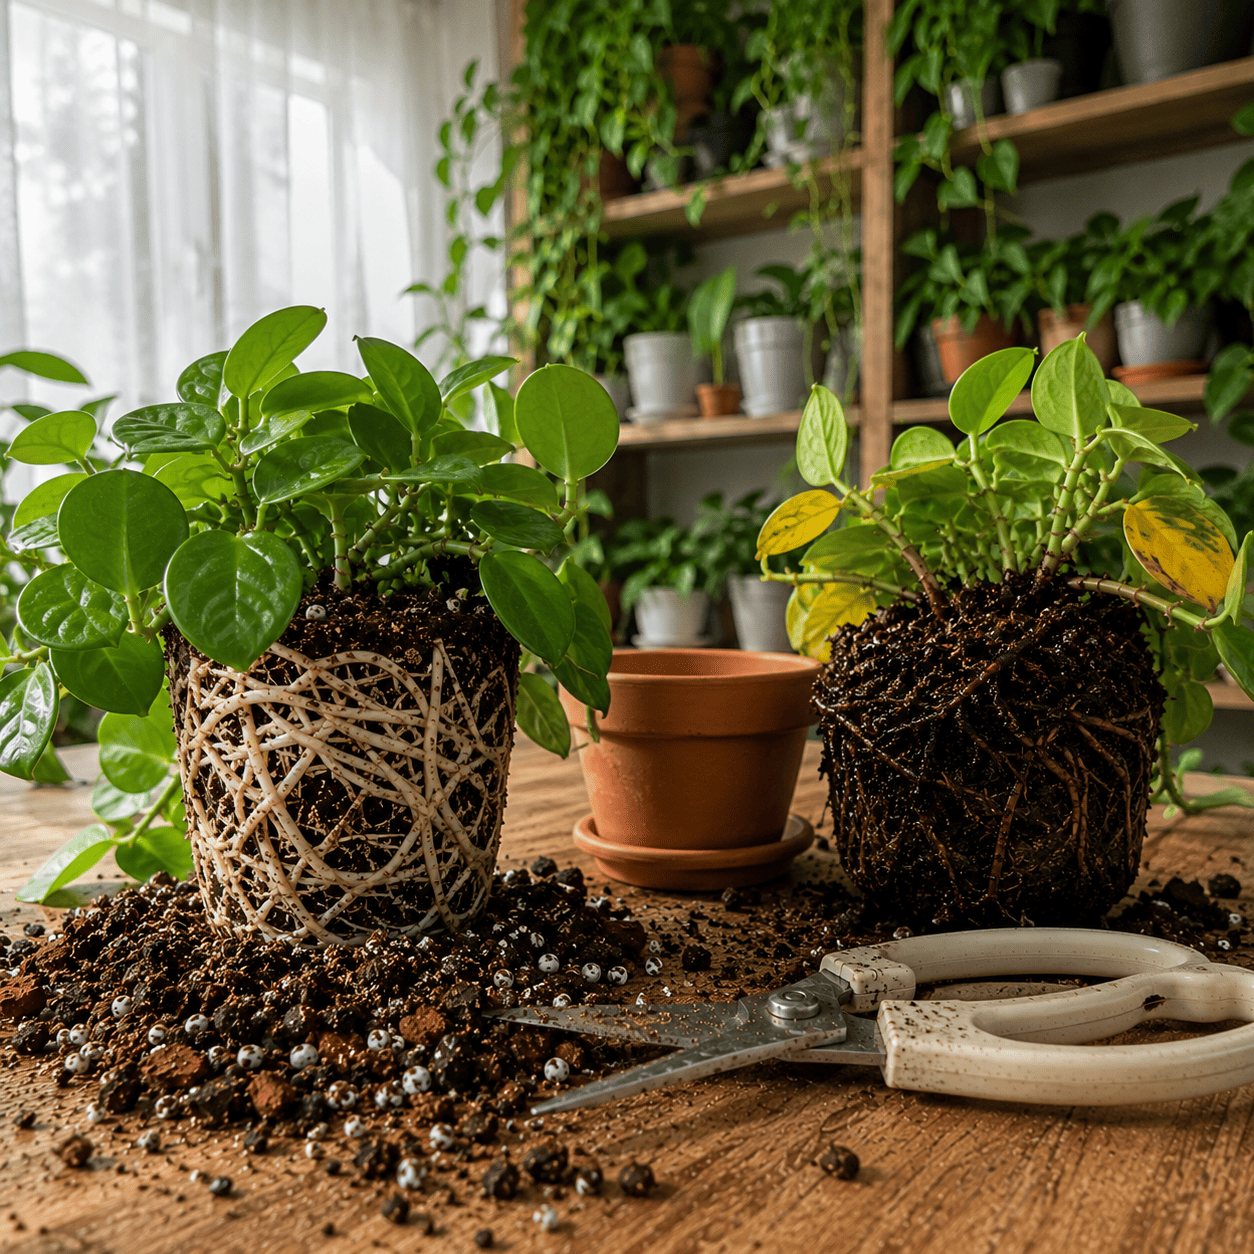
Instead of firm white roots, I found dark brown mush that smelled awful.
I’d been trying to help my Hoya, but every watering was making the problem worse.
The good news?
Root rot isn’t always a death sentence.
If you catch it early enough, many Hoyas recover completely.
In this guide, I’ll show you exactly how to recognize root rot, how to tell it apart from underwatering, how to save your plant step by step, and most importantly, how to stop it from ever happening again.
Root Rot at a Glance
| Feature | Details |
|---|---|
| Cause | Soil staying wet too long |
| Main Symptoms | Yellow leaves, mushy roots, soft stems |
| Can It Be Saved? | Usually yes, if treated early |
| Most Common Mistake | Watering even more |
| Treatment | Remove rotten roots, fresh chunky soil, adjust watering |
| Recovery Time | 2–8 weeks depending on severity |
| Difficulty | ⭐⭐⭐☆☆ |
One thing I’ve learned is that root rot rarely happens overnight.
It’s usually the result of several small mistakes adding up over time.
What Is Root Rot?
Despite the name, root rot isn’t a disease that suddenly attacks healthy plants.
It’s usually the result of roots sitting in wet, oxygen-poor soil for too long.
Healthy roots need two things:
- Water
- Oxygen
Most beginners focus only on the first one.
But without oxygen, roots slowly begin to suffocate.
Once that happens, fungi and bacteria naturally present in the soil take advantage of the weakened roots.
That’s when they begin turning brown, soft, and mushy.
The longer they stay that way, the harder recovery becomes.
Why Hoyas Get Root Rot So Easily
One reason Hoya owners run into root rot so often is because Hoyas don’t grow like typical houseplants.
In nature, many Hoyas grow attached to trees.
Their roots are exposed to constant airflow.
Rain wets the roots…
Then they’re able to dry quickly.
Inside our homes, things are different.
Heavy potting soil.
Decorative pots with poor drainage.
Watering every weekend.
Those three things create the perfect conditions for root rot.
Ironically, most people lose Hoyas because they care too much, not too little.
How to Tell if Your Hoya Has Root Rot
One of the hardest parts about diagnosing root rot is that the first symptoms often look exactly like underwatering.
Yellow leaves.
Wrinkled leaves.
Slow growth.
Drooping vines.
At first glance, it’s easy to think your Hoya simply needs more water.
That’s why so many people accidentally make the problem worse.
Instead of checking the roots…
They water again.
Early Signs of Hoya Root Rot
The earlier you catch root rot, the easier it is to save your plant.
Unfortunately, the first warning signs are easy to miss because they develop gradually.
Here’s what I look for before the problem becomes serious.
Yellow Leaves
Usually, the oldest leaves begin turning yellow first.
One yellow leaf isn’t always a concern.
Several yellow leaves appearing within a short period usually deserve a closer look.
Wrinkled Leaves Even Though the Soil Is Wet
This confuses a lot of people.
The soil is damp…
Yet the leaves look thirsty.
That’s because damaged roots can’t absorb water properly anymore.
The plant is technically surrounded by water but is still dehydrated.
Growth Suddenly Stops
Healthy Hoyas are slow growers compared to many houseplants, but they should still produce new vines and leaves during the growing season.
If months pass without any new growth, especially while the soil stays wet, root health is worth checking.
Soft or Black Stems
This is usually a later symptom.
If the base of the stem feels soft instead of firm, the rot may already be spreading upward from the roots.
Don’t wait if you notice this.
A Bad Smell Coming From the Pot
Healthy potting mix smells fresh.
Rotting roots don’t.
If you notice a sour, swampy, or rotten smell after watering, I always recommend inspecting the roots.
Healthy Roots vs Rotten Roots
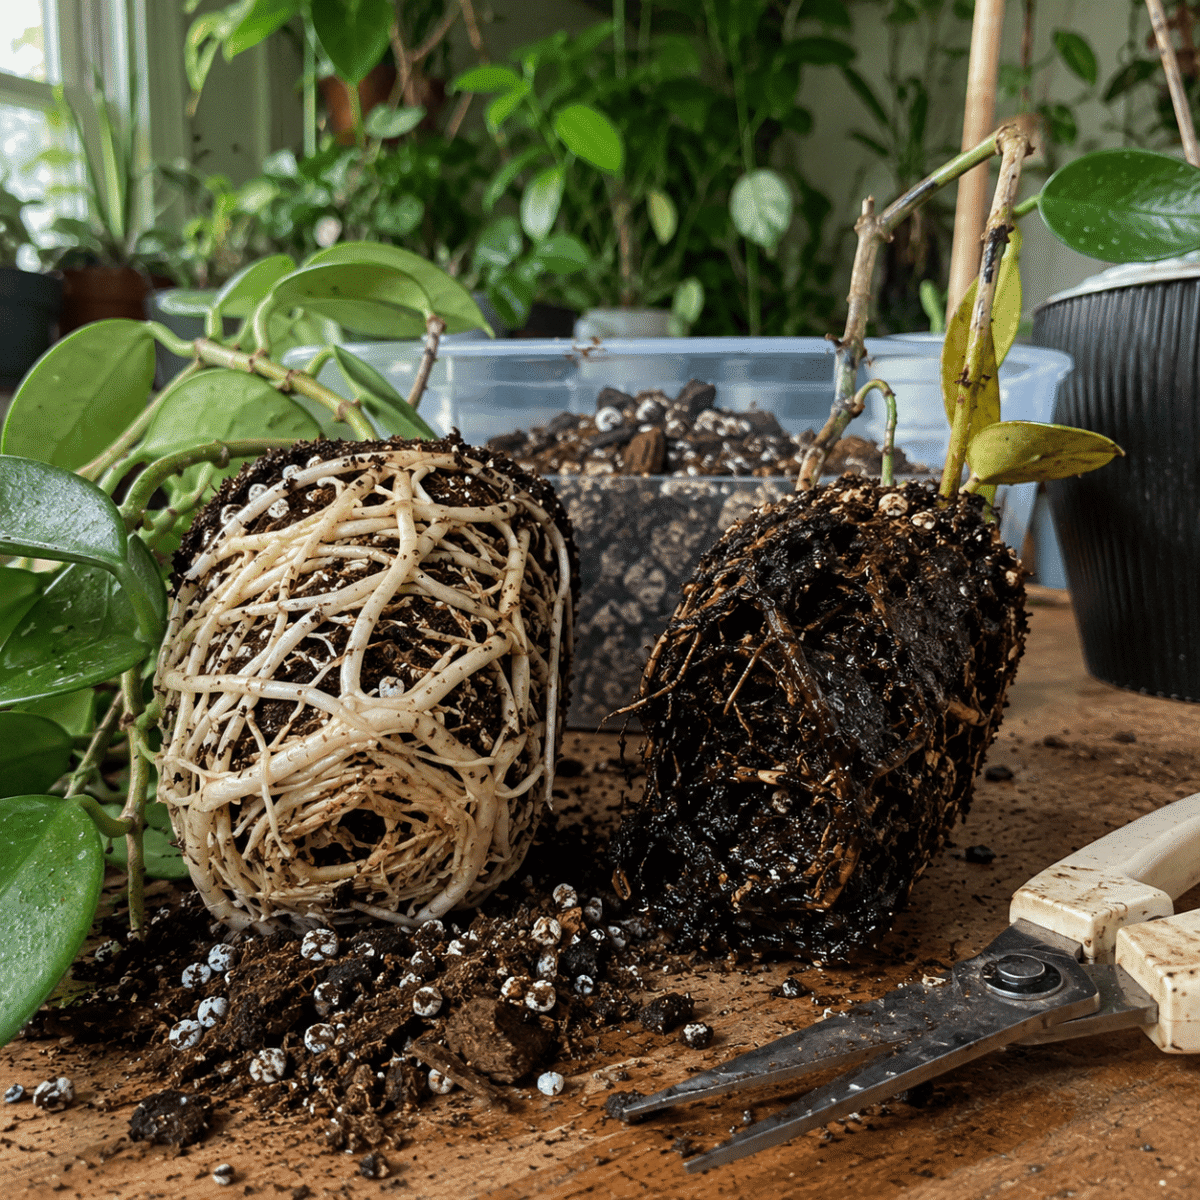
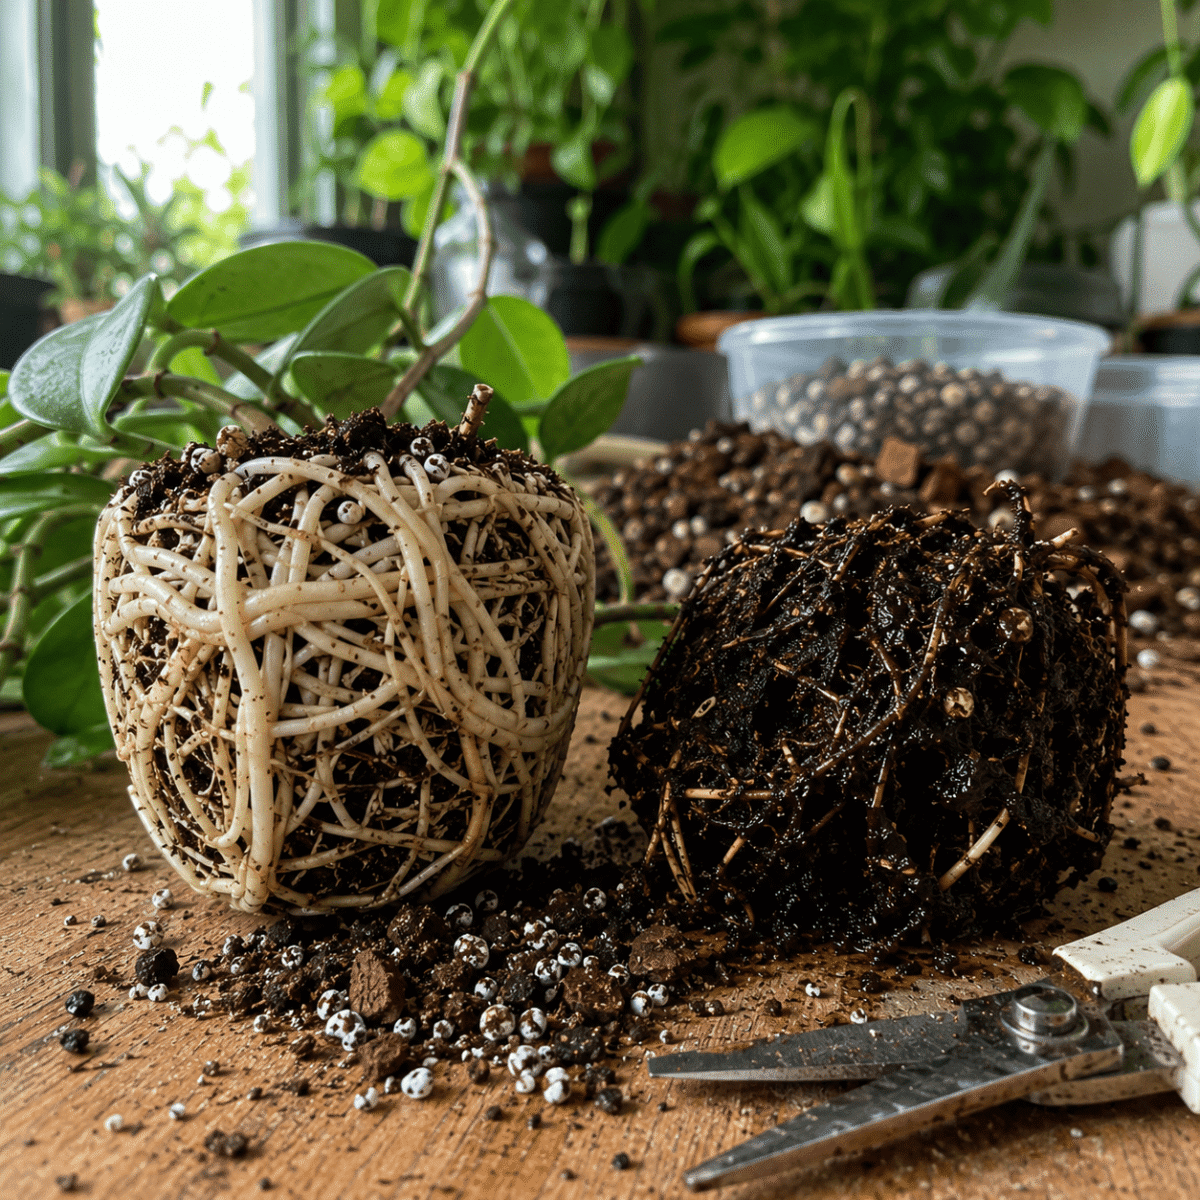
One of the easiest ways to know what’s happening is simply to look at the roots.
| Healthy Roots | Rotten Roots |
|---|---|
| Bright white or cream | Brown or black |
| Firm and crisp | Soft and mushy |
| Fresh earthy smell | Sour or rotten smell |
| Hold together when touched | Fall apart easily |
| Produce new white root tips | No active growth |
Once you’ve seen healthy Hoya roots next to rotten ones, the difference is surprisingly obvious.
Root Rot or Underwatering?
This is probably the question I get asked the most.
Because believe it or not…
The symptoms can look almost identical.
Both problems can cause:
- Yellow leaves
- Wrinkled leaves
- Drooping vines
- Slow growth
The difference is what’s happening below the soil.
Signs It’s Probably Underwatering
- Soil is completely dry.
- Pot feels very light.
- Leaves become slightly soft before watering.
- Plant improves within a day or two after watering.
Signs It’s Probably Root Rot
- Soil has stayed wet for several days.
- Pot feels heavy all the time.
- Leaves continue getting worse after watering.
- Roots are brown, soft, or mushy.
- Soil smells unpleasant.
Whenever I’m unsure…
I stop guessing.
I gently slide the plant out of its pot and inspect the roots.
That takes less than five minutes and usually gives me the answer immediately.
Why Overwatering Isn’t Actually About Too Much Water
This is something that surprised me when I first learned it.
Root rot isn’t caused by giving a plant too much water once.
It’s caused by keeping the roots wet for too long.
You could pour a gallon of water through a chunky, well-draining Hoya mix and still be perfectly fine.
The excess drains away.
The real danger is soil that stays wet for days because it:
- Holds too much moisture.
- Doesn’t contain enough air.
- Never gives the roots a chance to breathe.
That’s why improving your soil mix often solves the problem better than simply watering less.
The 7 Most Common Causes of Root Rot
After seeing hundreds of root rot cases, these are the causes I see over and over again.
1. Watering on a Schedule
Plants don’t care what day of the week it is.
Always check the soil first.
2. Heavy Potting Soil
Dense soil stays wet far longer than Hoyas like.
3. Pots Without Drainage Holes
Excess water has nowhere to go.
4. Oversized Pots
More soil means more trapped moisture.
5. Cold Temperatures
Cool rooms slow evaporation dramatically.
6. Poor Airflow
Stagnant conditions keep the soil wet longer.
7. Repotting Into Moist Soil Too Often
Fresh soil plus frequent watering can easily overwhelm newly disturbed roots.
Almost every case of root rot is the result of several small factors working together, not just one mistake.
How to Save a Hoya With Root Rot (Step by Step)
The first time I treated root rot, I was terrified I’d make things worse.
Thankfully, Hoyas are surprisingly resilient.
As long as there are still some healthy roots left, there’s a very good chance your plant can recover.
Here’s exactly how I do it.
Step 1: Remove the Plant From the Pot
Gently slide the Hoya out of its pot.
Don’t pull on the vines.
Instead, squeeze the sides of the nursery pot if needed and carefully lift the root ball out.
If the soil is extremely wet, let it fall away naturally.
The goal is to expose as many roots as possible.
Step 2: Wash Away the Old Soil
I always rinse the roots under lukewarm running water.
This helps remove old soil and makes it much easier to see which roots are healthy and which ones need to go.
Take your time.
Healthy roots are worth saving.
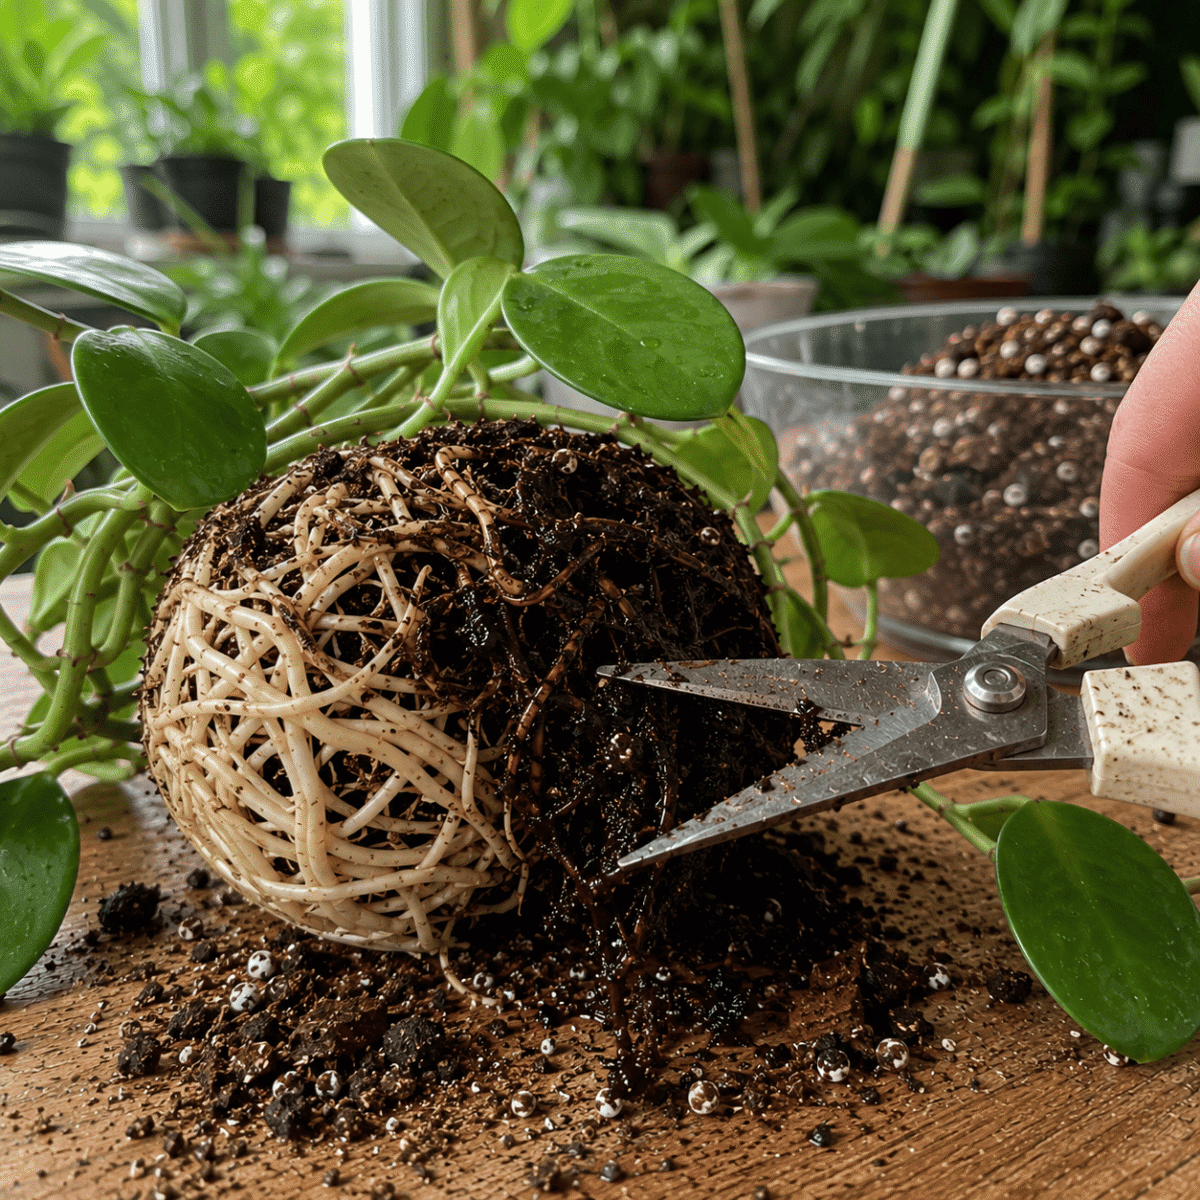
Step 3: Remove Every Rotten Root
This is the most important step.
Using clean, sterilized scissors, trim away every root that’s:
- Brown
- Black
- Soft
- Mushy
- Hollow
- Falling apart
Only leave the firm white or cream-colored roots behind.
Don’t worry if you have to remove quite a few.
Leaving rotten roots attached usually causes the problem to continue.
Step 4: Let the Roots Dry
After trimming, I usually let the roots air dry for 30–60 minutes.
This allows the fresh cuts to dry slightly before they go back into a pot.
It’s a small step, but I think it helps reduce the chance of the remaining roots becoming infected.
Step 5: Repot in Fresh Soil
Never reuse the old soil.
It has already stayed wet long enough to cause problems.
Instead, use a fresh, chunky mix that drains quickly.
My favorite recipe is:
- 40% orchid bark
- 30% perlite
- 20% coco chips
- 10% quality potting mix
Healthy roots need air just as much as they need moisture.
Step 6: Choose the Right Pot
This is where many people accidentally repeat the same mistake.
Choose a pot that’s only 1–2 inches (2–5 cm) larger than the remaining root system.
A pot that’s too large holds unnecessary moisture and slows drying.
Make sure it has drainage holes.
Always.
Step 7: Wait Before Watering Again
This surprises a lot of people.
After repotting, I don’t rush to water every day.
If the fresh potting mix is already slightly moist, I simply let the plant settle.
From then on, I only water when the soil has mostly dried.
The goal is to encourage healthy new roots—not keep the old wounds constantly wet.
Should You Use Hydrogen Peroxide?
This is probably one of the most debated topics among Hoya growers.
Personally…
I don’t think it’s a miracle cure.
Some growers use a diluted hydrogen peroxide solution to help clean the root system after removing rotten roots.
Others skip it completely and still have excellent results.
From my own experience, removing every rotten root and repotting into fresh, airy soil has made a much bigger difference than any treatment I could add afterward.
If you decide to use hydrogen peroxide, think of it as an optional extra—not the thing that saves the plant.
Should You Propagate Instead?
Sometimes…
Yes.
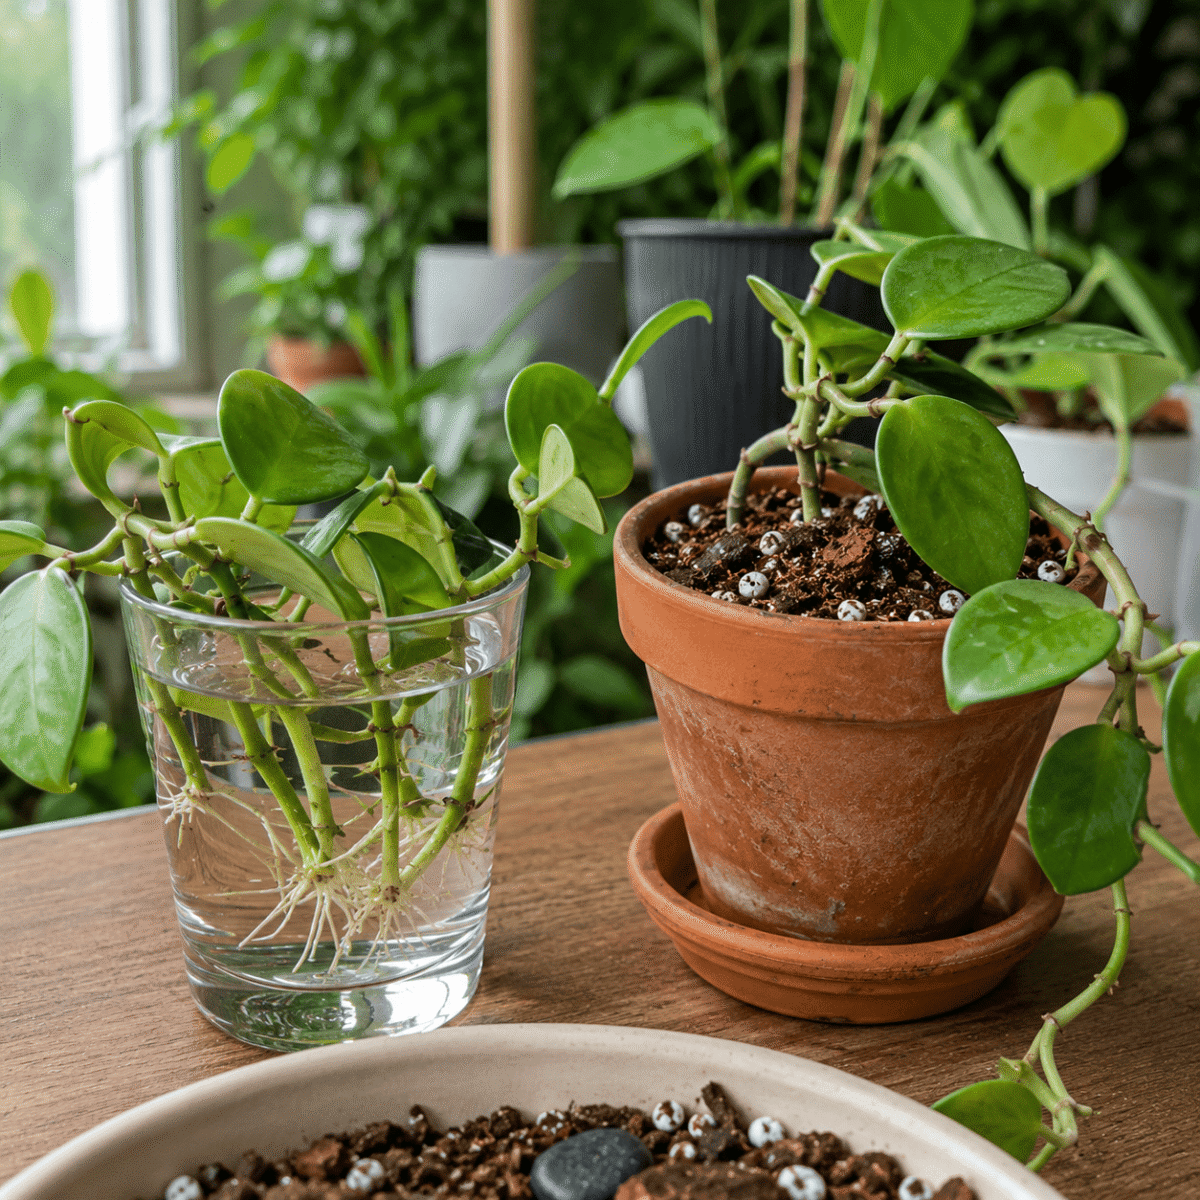
If more than 70–80% of the root system is gone, or the rot has started moving up into the stem, I usually take a few healthy cuttings as insurance.
That way, even if the mother plant doesn’t recover, I still have healthy pieces to start over with.
It’s something I wish I’d done sooner with one of my first Hoyas.
How Long Does Recovery Take?
This depends on how severe the root rot was.
Here’s what I normally expect.
| Time After Treatment | What Usually Happens |
|---|---|
| First week | Plant settles, little visible change |
| Weeks 2–4 | Healthy roots begin growing |
| Weeks 4–8 | New leaves or vines often appear |
| Months 2–3 | Plant resumes normal growth |
Don’t expect overnight results.
A recovering Hoya spends its energy rebuilding its roots before producing lots of new leaves.
That’s exactly what you want.
Can You Save a Hoya With Severe Root Rot?
Sometimes.
But it depends on how much healthy tissue is left.
I’ve seen Hoyas recover after losing more than half of their roots.
I’ve also seen plants with only minor root damage decline because the rot wasn’t removed completely.
Instead of focusing on how bad it looks, ask yourself one question:
Does the plant still have healthy roots or healthy stem tissue left?
If the answer is yes, it’s definitely worth trying to save.
Mild Root Rot
Good news.
Recovery is usually straightforward.
Simply:
- Remove the damaged roots.
- Repot into fresh chunky soil.
- Adjust your watering routine.
Most Hoyas bounce back within a few weeks.
Moderate Root Rot
If around half of the roots are affected, recovery takes longer.
The plant may:
- Drop a few older leaves.
- Pause growth for several weeks.
- Focus entirely on rebuilding its root system.
This is normal.
The biggest mistake here is assuming it’s getting worse and watering more often.
Severe Root Rot
If almost every root is black and mushy, don’t panic.
You still have two options.
Option 1
Save any healthy roots that remain.
Option 2
Take healthy stem cuttings and propagate them.
I’ve rescued several Hoyas this way that I thought were completely lost.
How to Prevent Root Rot From Happening Again
Once you’ve dealt with root rot once…
You never really want to deal with it again.
Thankfully, prevention is much easier than treatment.
1. Stop Watering on a Schedule
This is probably the biggest change I ever made.
Plants don’t need water every Saturday.
They need water when the soil is dry.
Always let the plant decide—not the calendar.
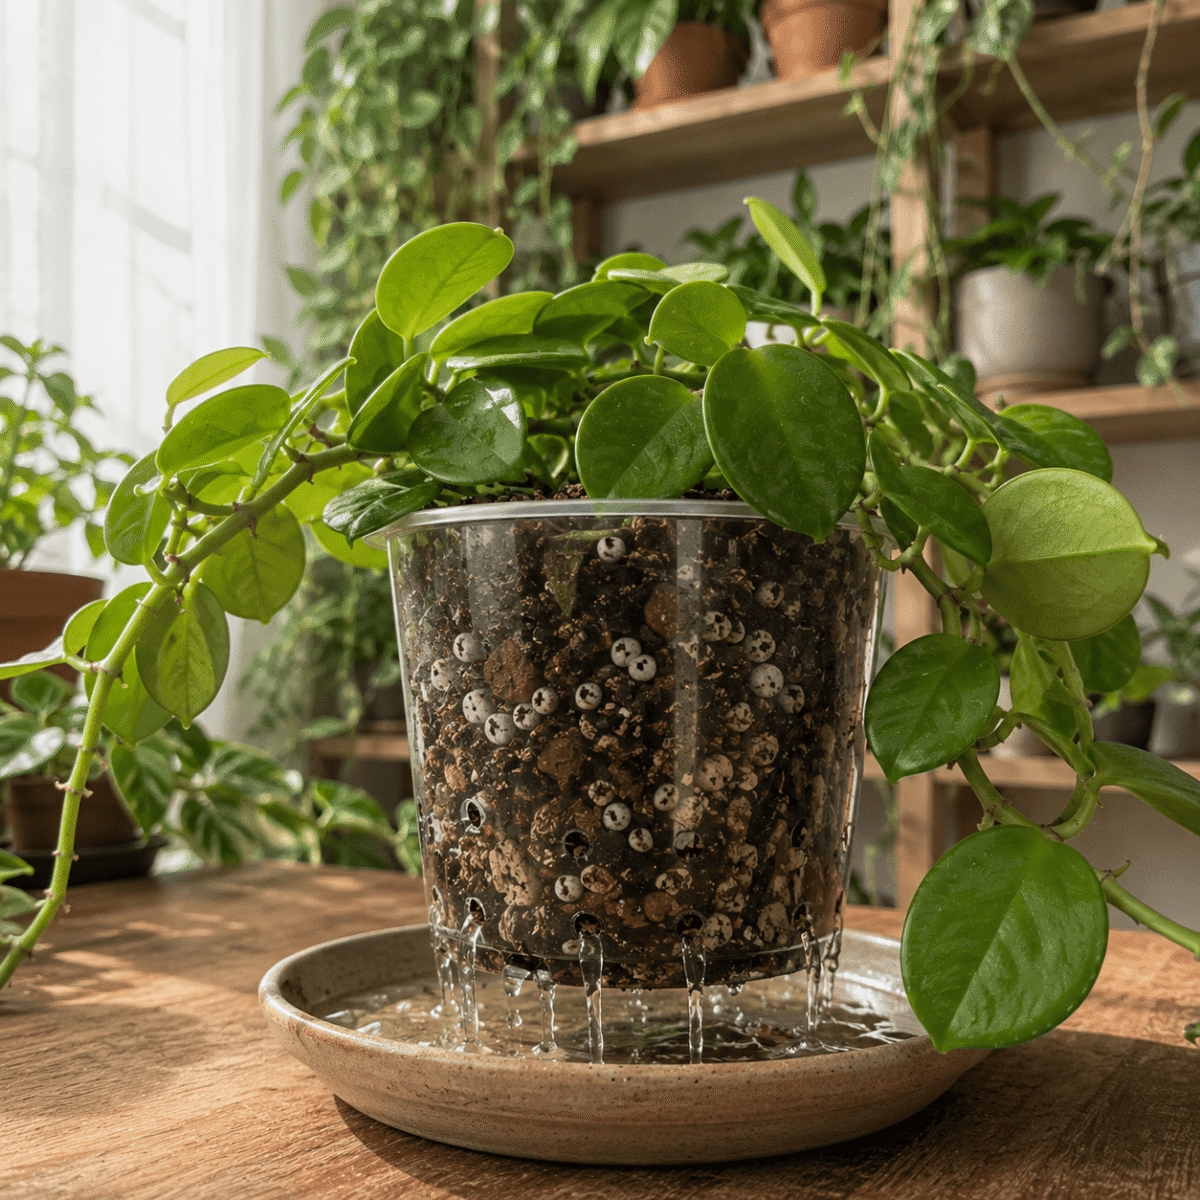
2. Use a Chunky Soil Mix
Heavy potting soil stays wet for far too long.
A chunky mix with bark and perlite dries faster while allowing roots to breathe.
Healthy roots need oxygen.
3. Always Use Pots With Drainage
No exceptions.
A beautiful decorative pot without drainage holes isn’t worth risking your Hoya.
If you love decorative pots, place the nursery pot inside them instead.
4. Choose the Right Pot Size
Oversized pots are one of the most overlooked causes of root rot.
More soil means:
- More retained moisture.
- Slower drying.
- Greater chance of overwatering.
Only increase one pot size at a time.
5. Improve Airflow
Good airflow helps both the plant and the potting mix dry more evenly.
Even a small fan in a plant room can make a noticeable difference.
6. Water Thoroughly… Then Leave It Alone
This sounds backwards.
But Hoyas actually prefer a deep watering followed by a drying period.
Tiny daily splashes keep the top of the soil wet while leaving the lower roots constantly damp.
Instead:
Water deeply.
Let excess water drain away.
Then wait until the soil has mostly dried before watering again.
My Biggest Root Rot Mistakes
Looking back…
Almost every case of root rot I experienced could have been avoided.
Here are the mistakes that taught me the most.
I Watered Because the Top of the Soil Looked Dry
The surface can dry out surprisingly quickly.
Meanwhile, the bottom of the pot may still be soaking wet.
Now I always check deeper before watering.
I Trusted Moisture More Than Air
I used to think keeping the soil moist meant keeping the plant happy.
Now I know healthy roots need just as much oxygen as they need water.
I Used Decorative Pots Without Drainage
They looked great.
My Hoyas disagreed.
That hidden water sitting at the bottom was causing problems I couldn’t even see.
I Repotted Into a Pot That Was Too Big
I thought bigger pot…
Bigger plant.
Instead I got wetter soil and slower growth.
Now I only move up one pot size.
I Waited Too Long
This is probably my biggest regret.
I kept hoping the plant would recover on its own.
By the time I checked the roots, most of them were already gone.
Now, whenever something doesn’t look right, I inspect the roots early instead of guessing.
Things Nobody Tells You About Root Rot
These are the little lessons I wish I’d learned much sooner.
- Healthy roots should feel firm—not soft.
- Wrinkled leaves don’t always mean the plant needs water.
- A heavy pot often tells you more than the soil surface.
- One thorough watering is better than several light ones.
- Most Hoyas recover more slowly than people expect.
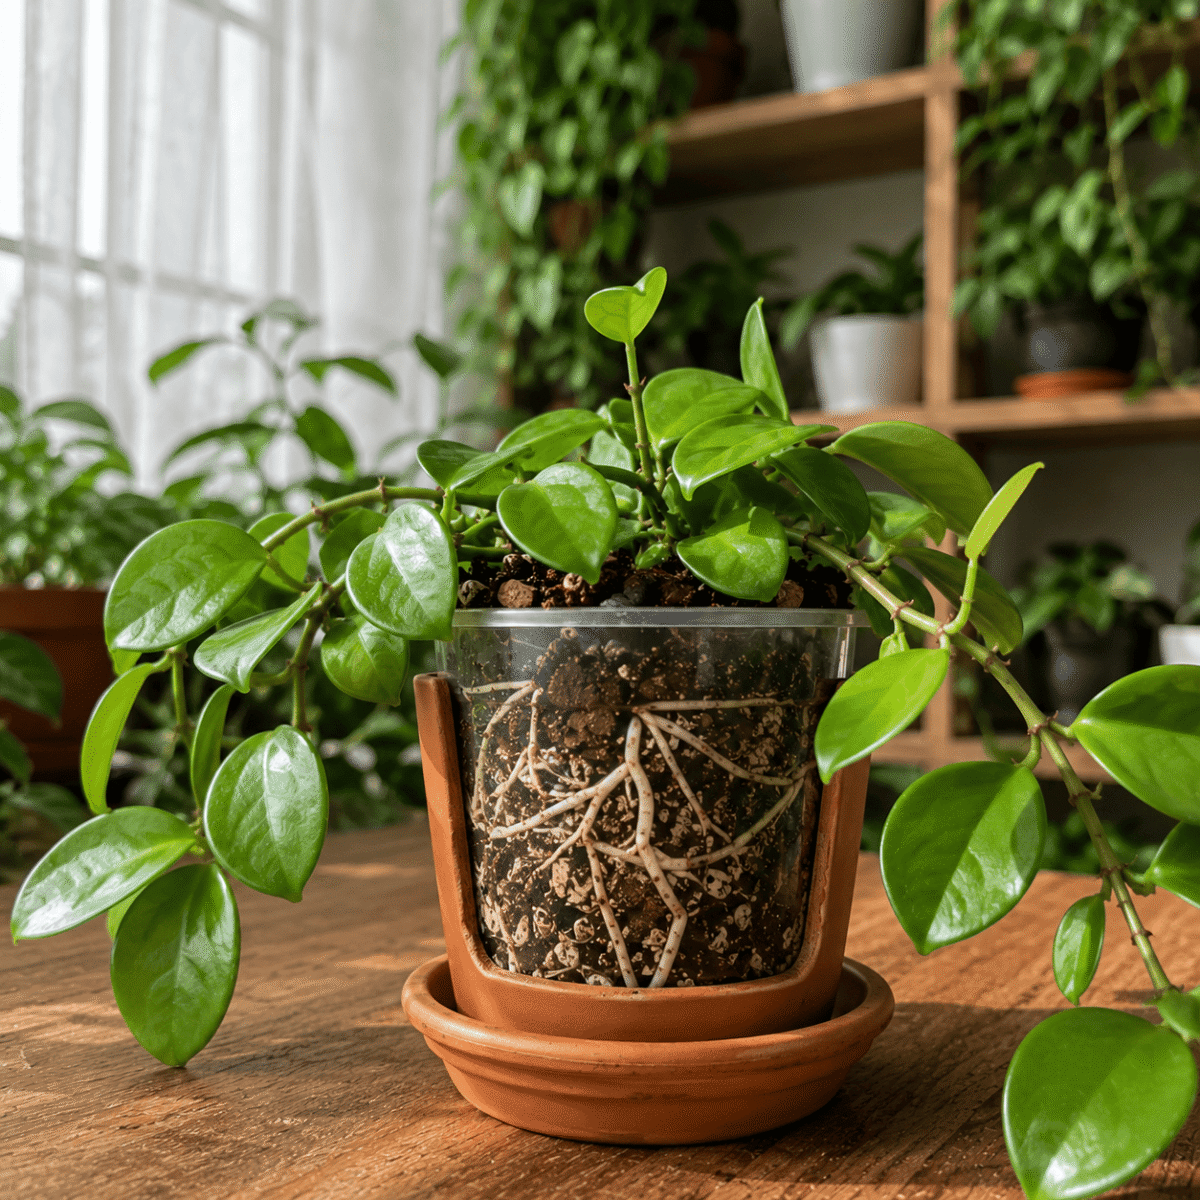
- Fresh white root tips are one of the best signs your plant is recovering.
- Sometimes doing nothing for a few extra days is healthier than watering too soon.
One thing I’ve learned over the years is that Hoyas are surprisingly resilient.
Give them healthy roots…
And they’ll usually do the rest.
Frequently Asked Questions
Yes—if you catch it early enough.
I’ve seen Hoyas lose a surprising number of roots and still make a full recovery.
The key is acting quickly.
Remove every rotten root, repot into fresh, airy soil, and resist the urge to overwater while the plant rebuilds its root system.
One of the best signs is new white root tips.
You may also notice:
Firm new leaves.
Fresh vine growth.
The soil drying at a normal rate.
No unpleasant smell from the pot.
Recovery is usually gradual, so don’t expect dramatic changes overnight.
If your fresh potting mix is already slightly damp, I usually wait a few days before watering again.
The goal is to let the freshly cut roots begin healing rather than keeping them constantly wet.
After that, return to watering only when the soil has mostly dried.
Not directly.
Root rot itself isn’t contagious like a virus.
However, using contaminated soil, dirty pots, or unsterilized pruning tools can introduce harmful fungi or bacteria to another plant.
That’s why I always clean my tools and use fresh potting mix after dealing with root rot.
Unfortunately, no.
Once a leaf has turned completely yellow, it won’t recover.
The good news is that if you’ve fixed the root problem, your Hoya should eventually replace those leaves with healthy new growth.
No.
Wait until you see healthy new roots and fresh growth.
Fertilizing too early can stress an already weakened root system.
I usually wait about a month after seeing new growth before feeding again.
I wouldn’t.
Once root rot has developed, it’s much safer to start with a fresh, chunky potting mix.
Potting mix is inexpensive compared to replacing a mature Hoya.
Not really.
Some growers swear by it.
Others never use it.
In my experience, removing every rotten root and repotting into a fresh, well-draining mix has always made the biggest difference.
Think of hydrogen peroxide as optional—not essential.
Recovery Checklist ✅
If you’re dealing with root rot right now, here’s the exact checklist I follow.
✔ Remove the plant from its pot.
✔ Wash away the old soil.
✔ Trim all soft, black, or mushy roots.
✔ Sterilize your scissors before and after use.
✔ Repot into fresh chunky soil.
✔ Use a pot with drainage holes.
✔ Place the plant in bright indirect light.
✔ Avoid fertilizing until new growth appears.
✔ Water only when the soil has mostly dried.
✔ Be patient.
Recovery often takes weeks, not days.
Final Thoughts
Root rot can look scary.
The first time I saw black, mushy roots, I honestly thought my Hoya was finished.
Thankfully, I was wrong.
Hoyas are much tougher than we often give them credit for.
If you remove the damaged roots, give the plant fresh, airy soil, and adjust your watering habits, there’s a good chance it will recover.
More importantly, you’ll probably become a better grower because of it.
Almost every experienced Hoya collector has dealt with root rot at least once.
The difference isn’t that they never make mistakes.
It’s that they learn from them.
If there’s one lesson I hope you take away from this guide, it’s this:
Don’t water because you’re worried. Water because your Hoya actually needs it.
That simple change has probably saved more of my Hoyas than anything else.